Arcade Cabinets
- VinceW
-
 Topic Author
- Offline
- User is blocked
-

Less
More
- Posts: 10
- Thank you received: 0
4 years 11 months ago - 4 years 11 months ago #22
by VinceW
-Vince-
What do you make?
Arcade Cabinets was created by VinceW
I wanted a place to document the process of making not 1 but 2 arcade cabinets. "Why 2?" A reasonable question, but I have a better question: Why not?
Seriously though, I have been planning to build one for a while, ever since a previous retrofit project, and the school that is hosting the maker space wanted one for their internal maker space I thought I would give it a shot.
Both builds have their own unique components, but at the heart of them is a Raspberry Pi.
What are my goals:
Okay so where to start:
That's easy, I just said it "Learn", I need to learn what makes an arcade cabinet, and how others before me have done it before. The best resource has been Bob Clagett from I Like to Make Stuff . He has made a couple cabinets, and sells his plans from his website, and so we bought the full size and the bartop. He also has videos on actually building these units on YouTube
Additionally I probably spent months watching videos, reading blogs, and basically studying everything I could about building a cabinet. (I tend to greatly over think things)
Another really good resource that I found that is kinda local (Edmonton) is Retroactive Arcade . They have a tonne of tutorials and they also sell almost everything you could want, even complete cabinets, and custom units.
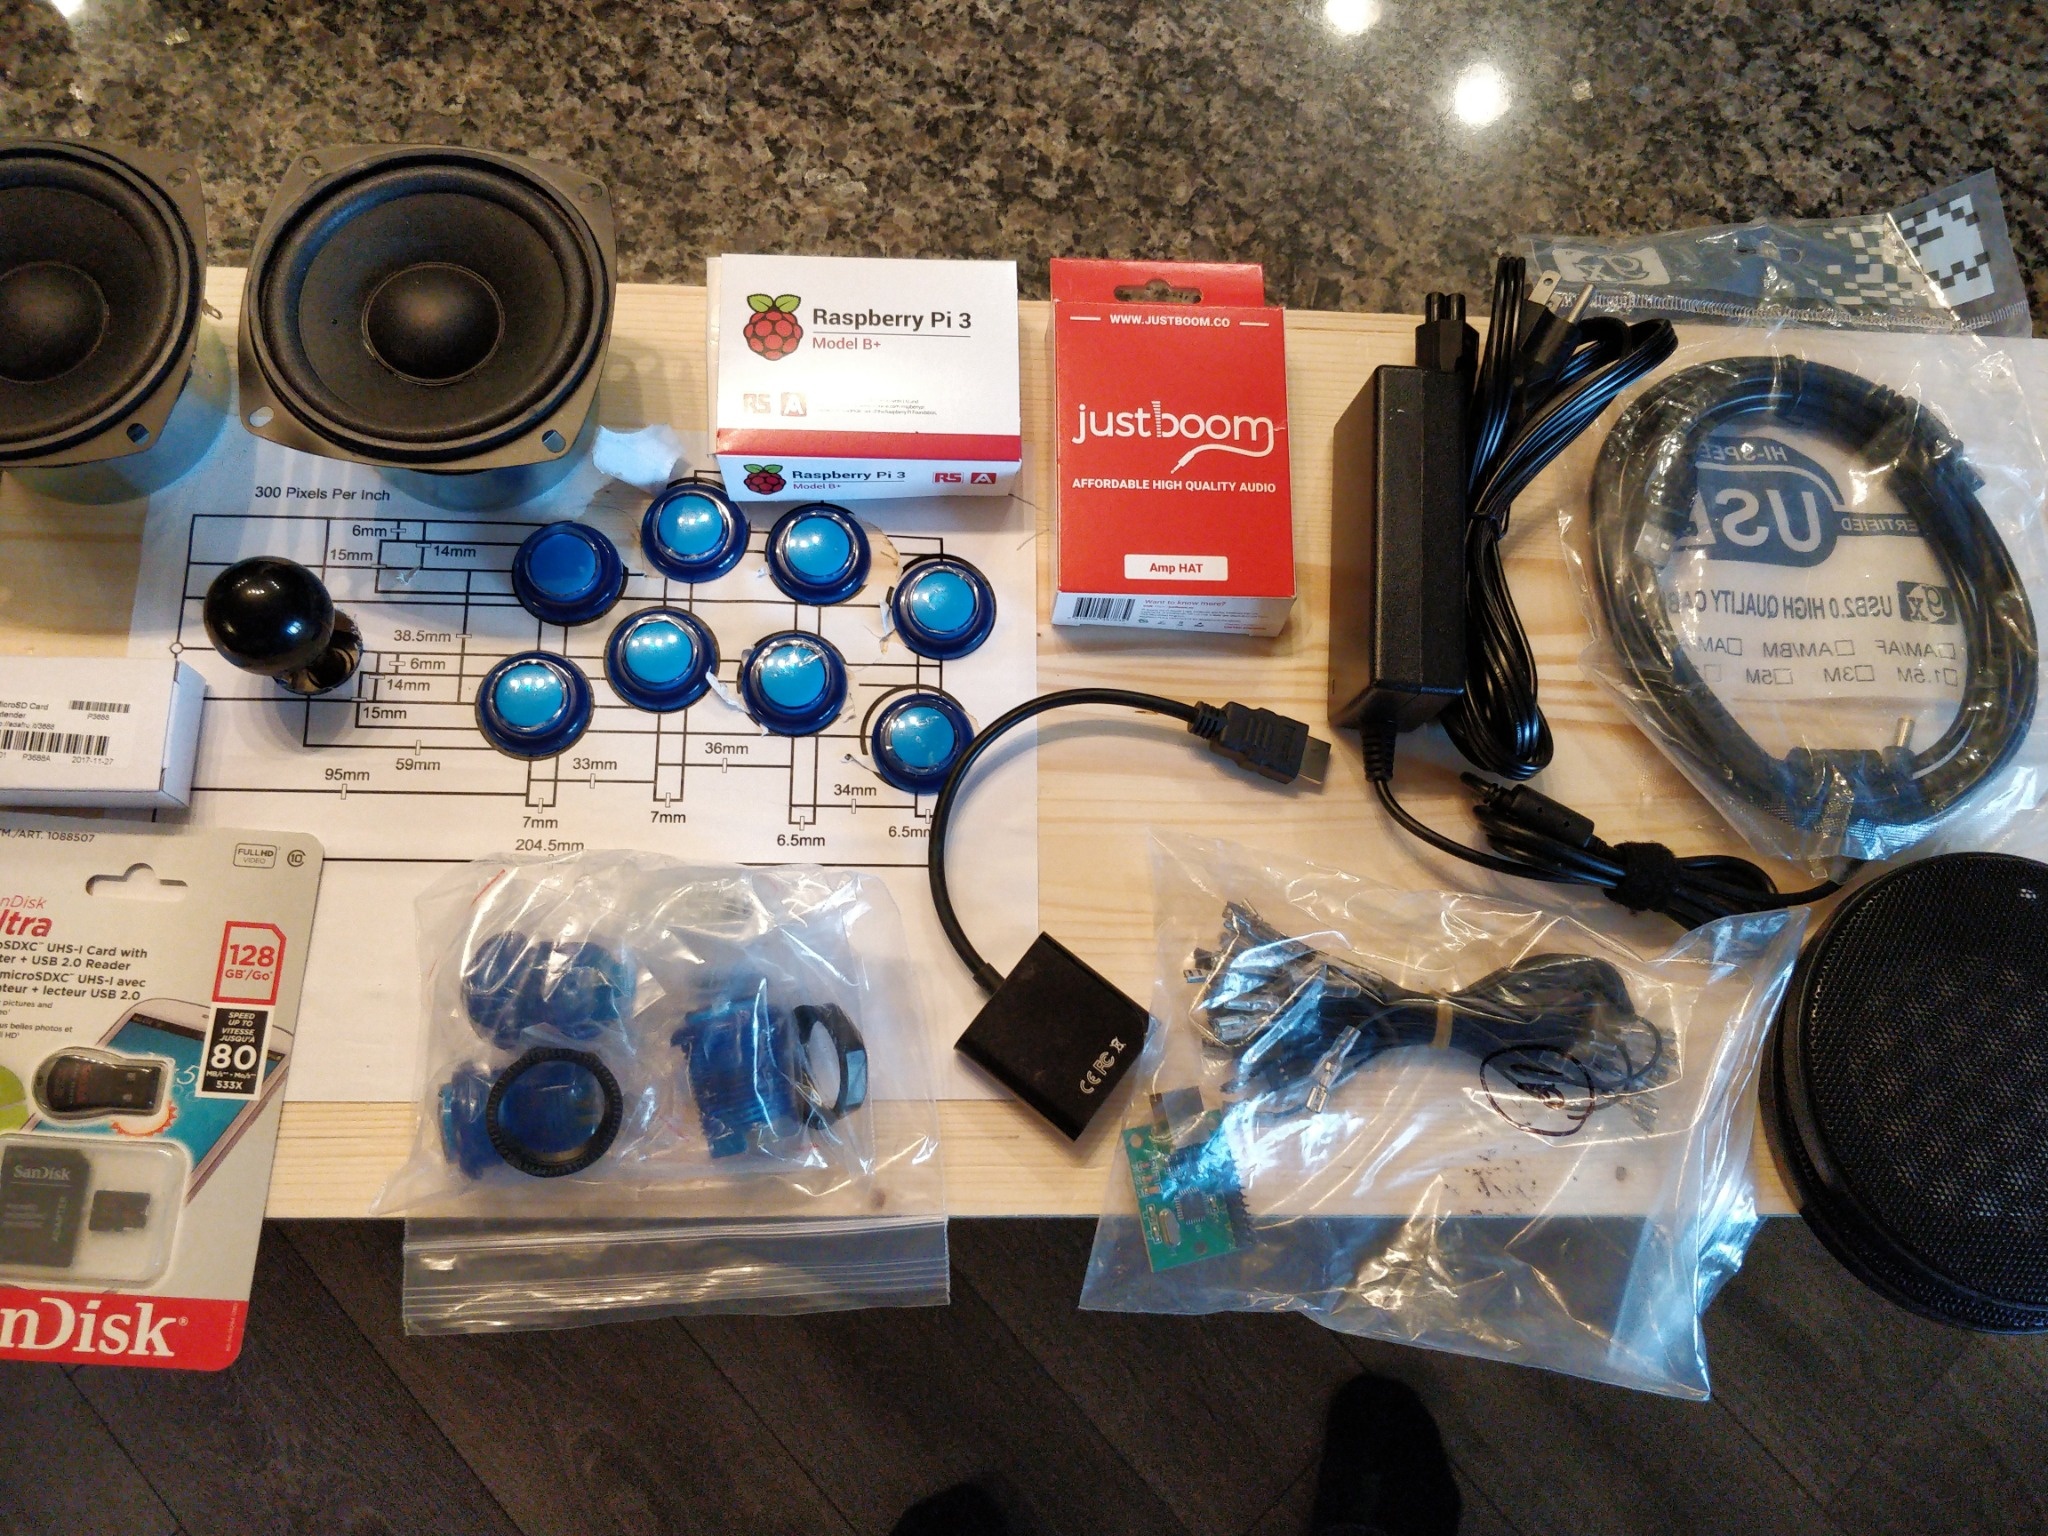
Okay, so I am building 2 units, what parts do I want in them? Again I spent way too much time on this but for my cutom unit, I wanted to make sure the sound was a little better so I opted for a DAC and 60W Amp, instead of just using the audio out of the Pi. I will include a true BOM for you to use if you ever want to try this on your own.
Custom:
Raspberry Pi 3b+
Sandisk Ultra 128GB MicroSD Card
MicroSD Card Extension
JustBOOM Amp Hat Kit
18v Power Supply
2 x 4" 30W speakers
Xin Mo Mame Controller Board
Zippy short metal arcade stick
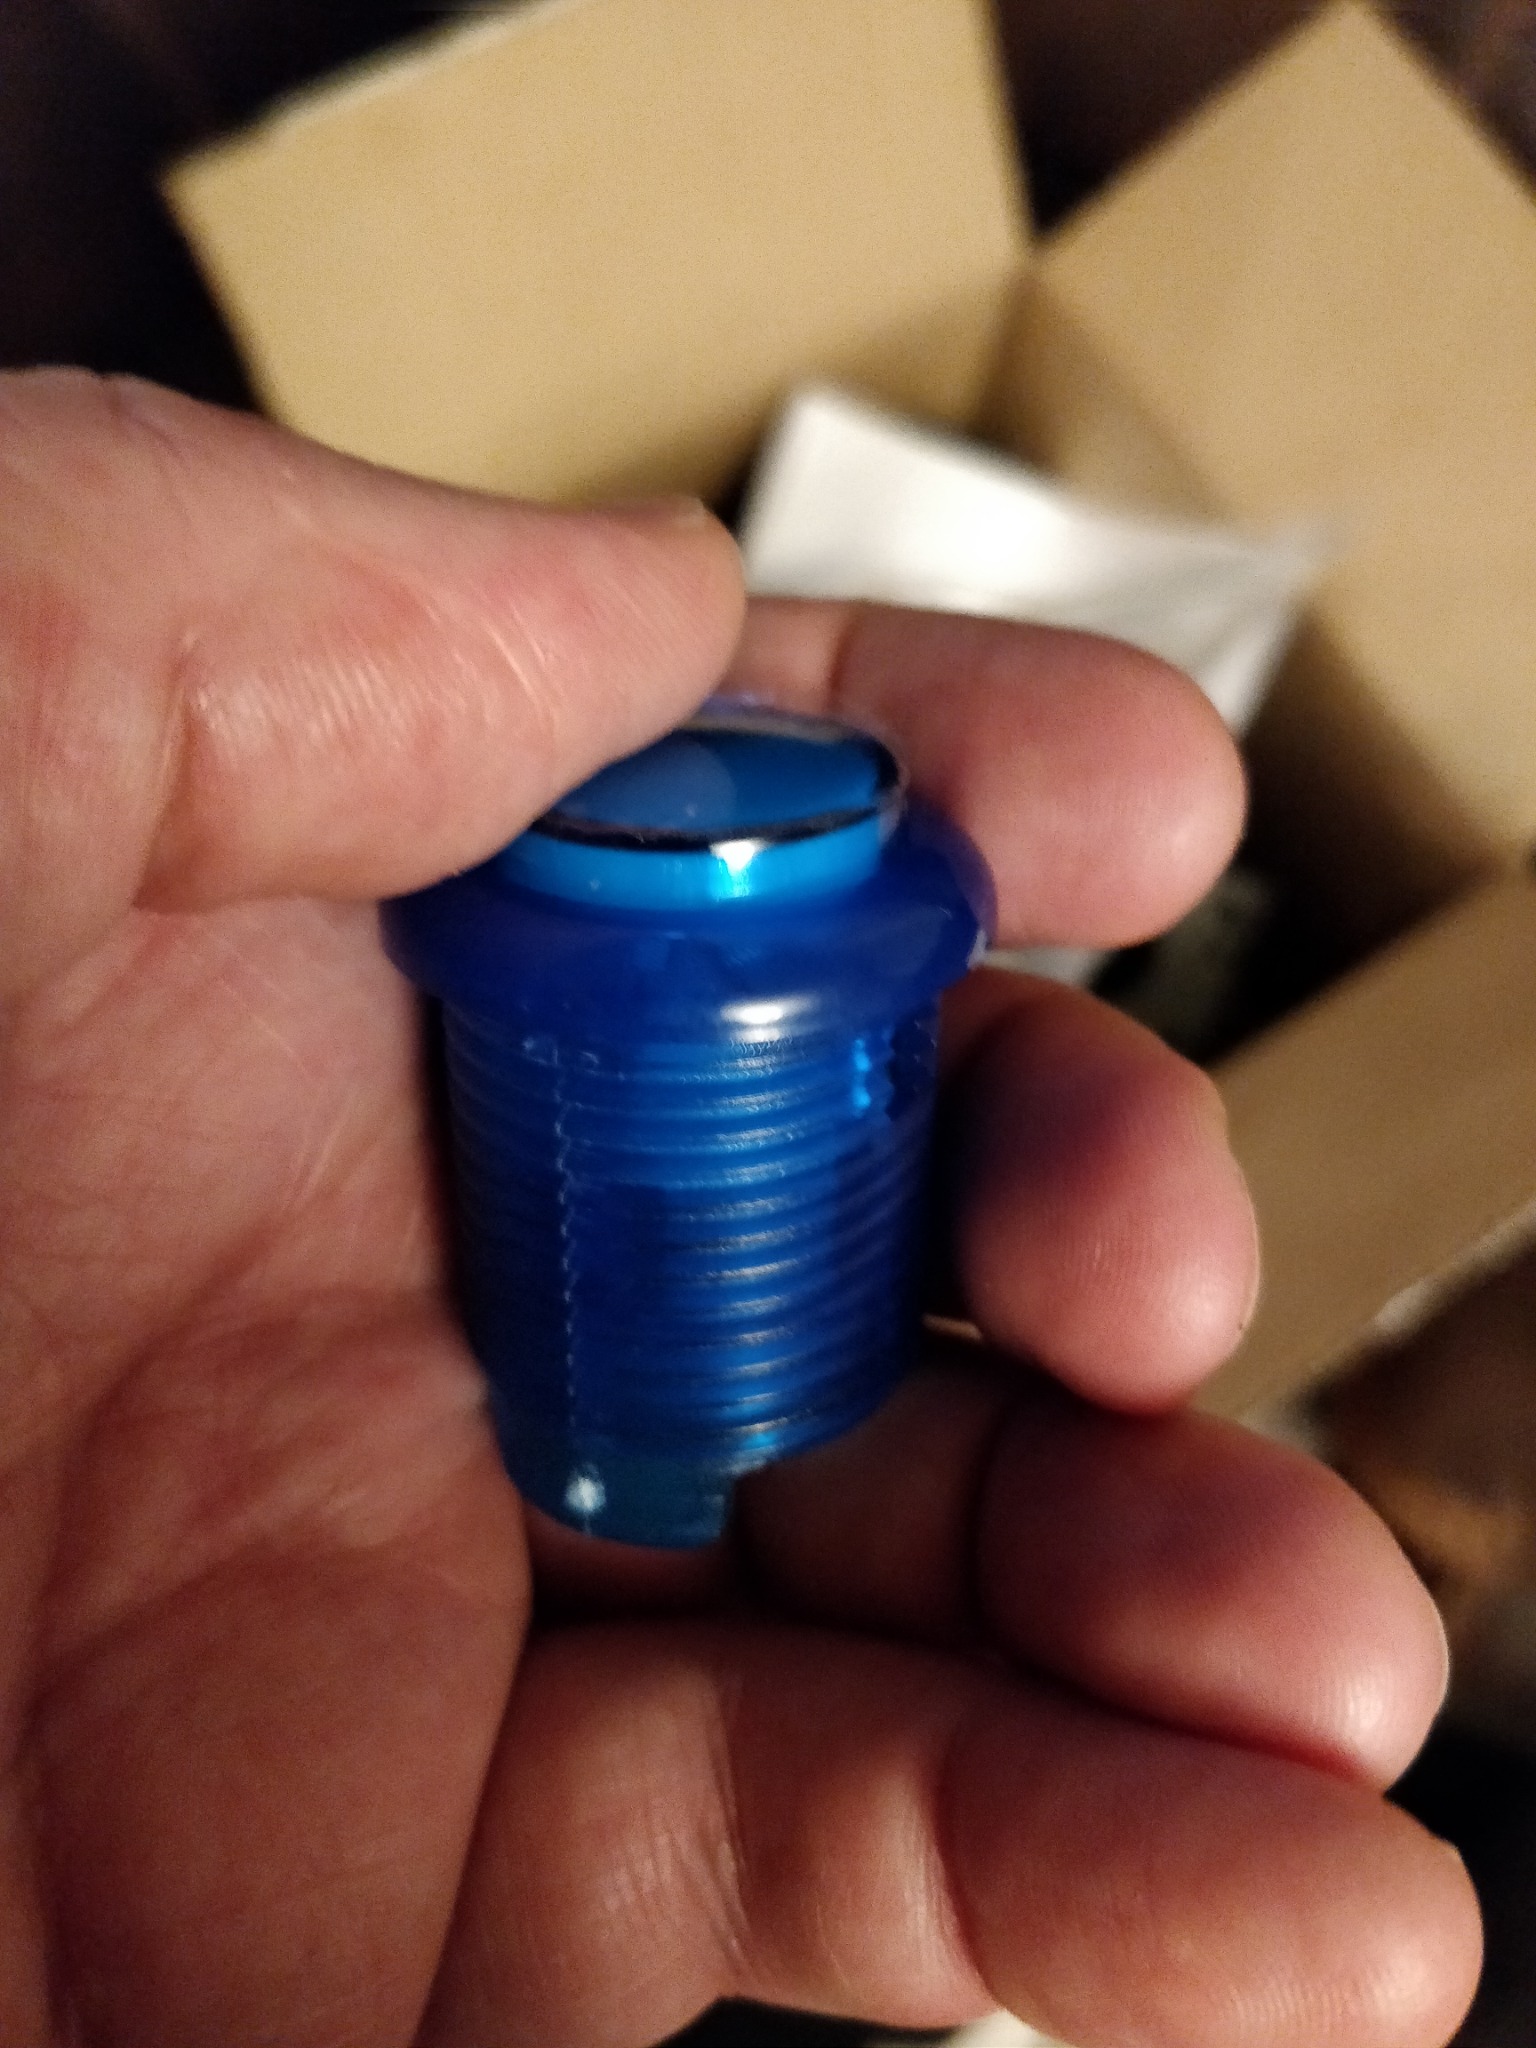
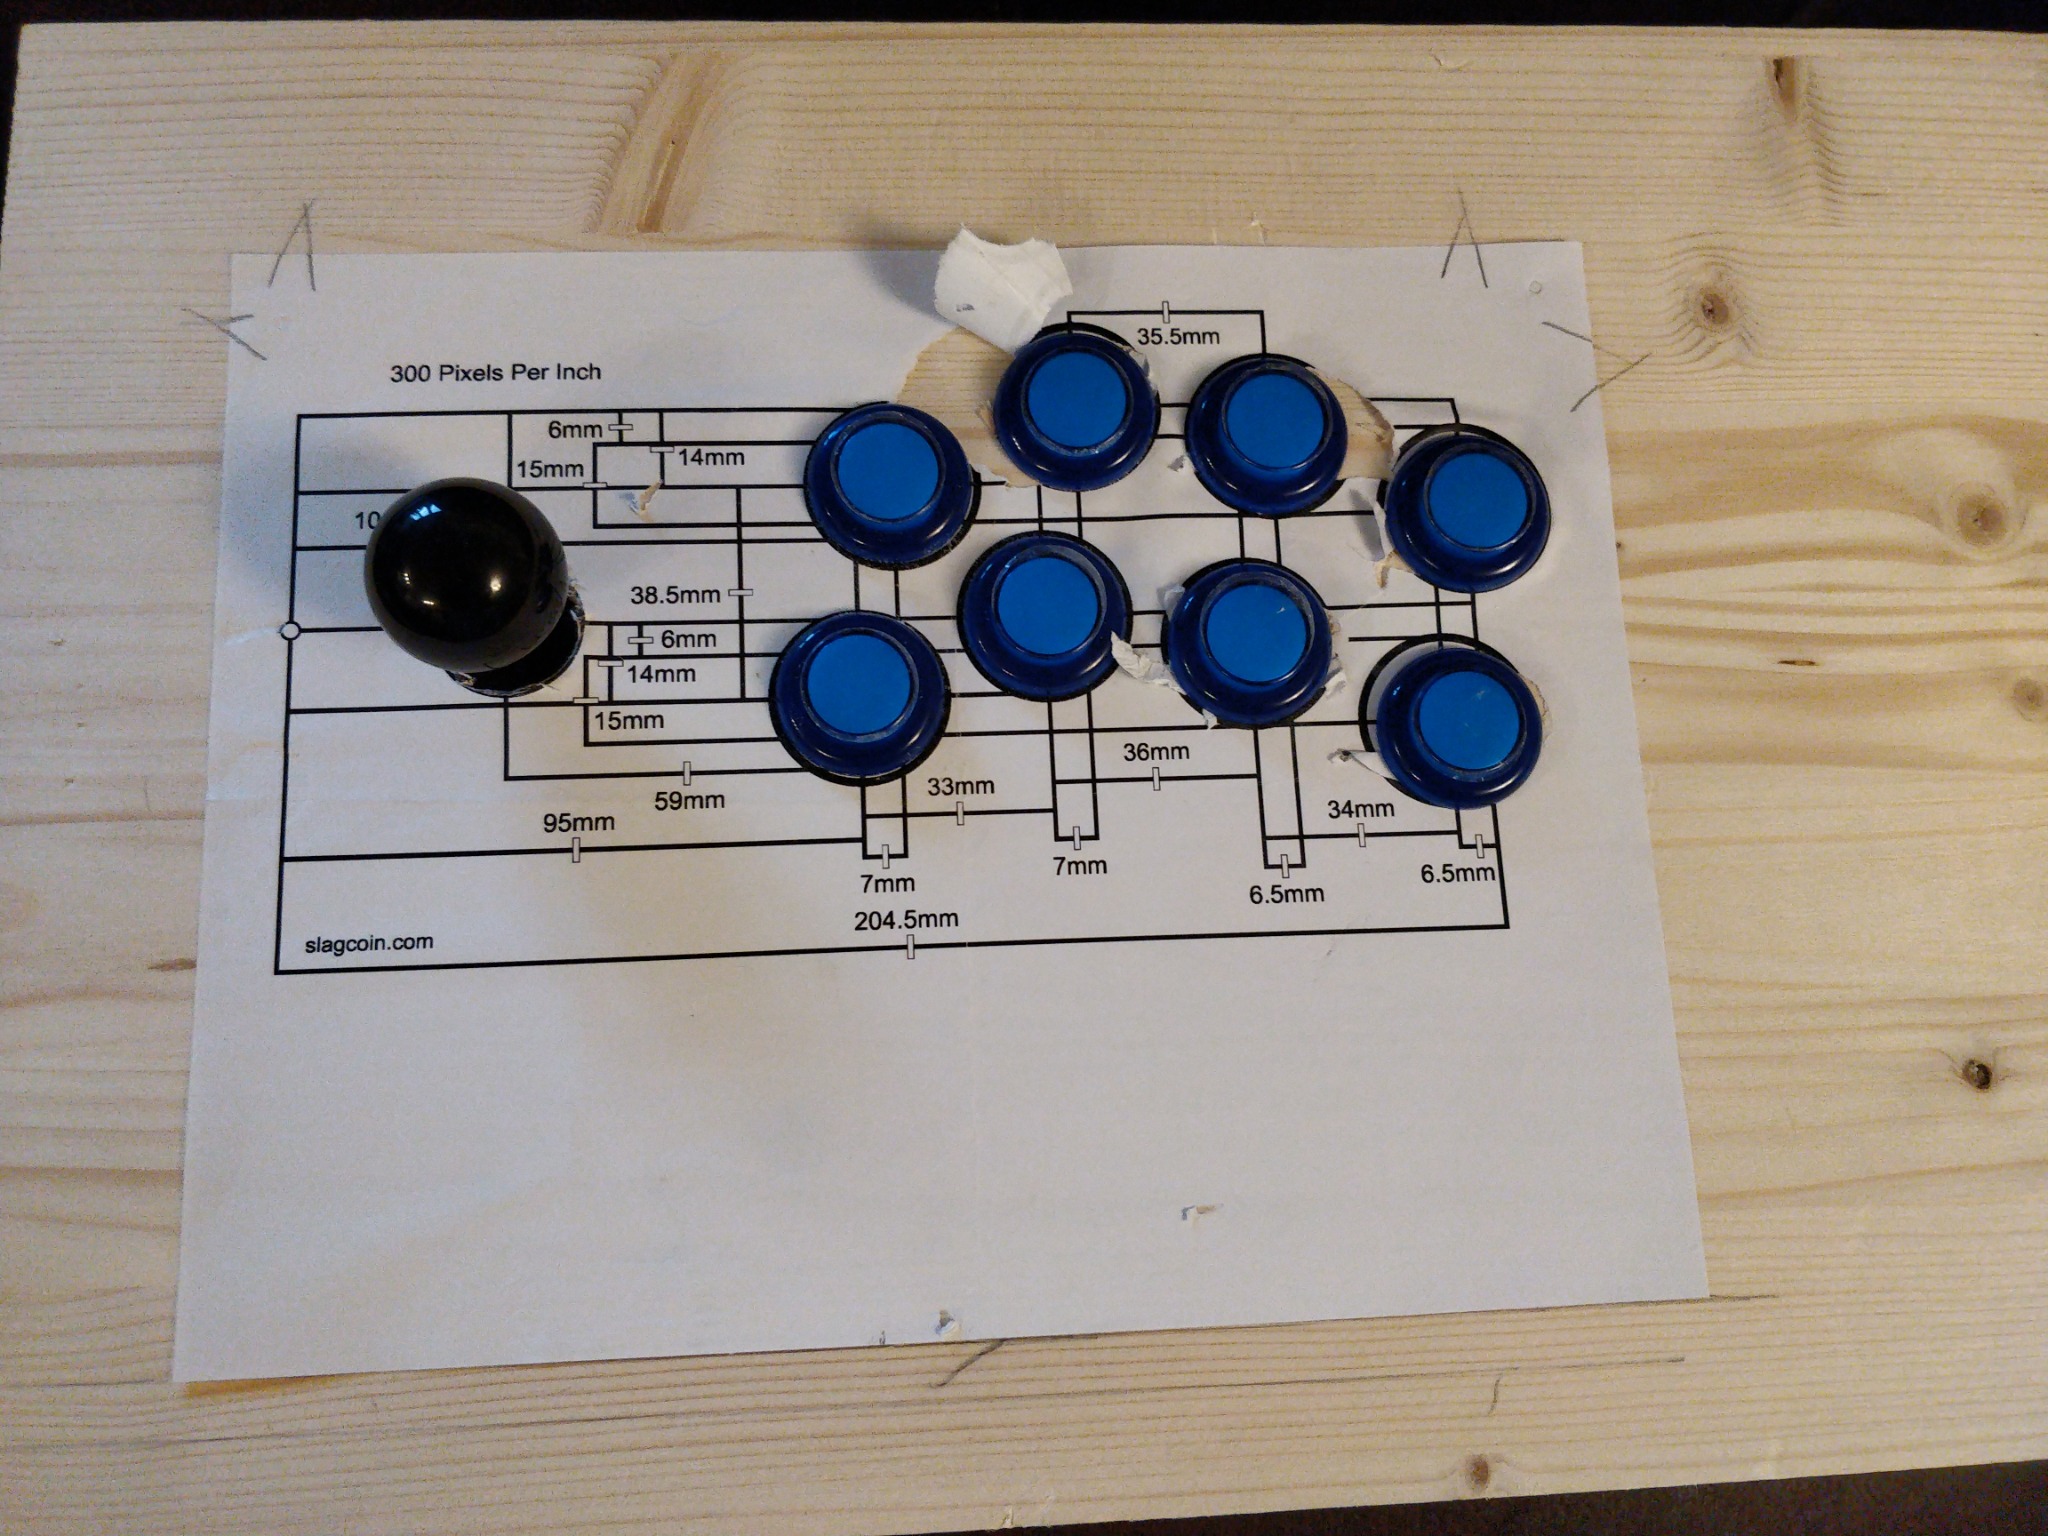
12 x Fusion LED buttons
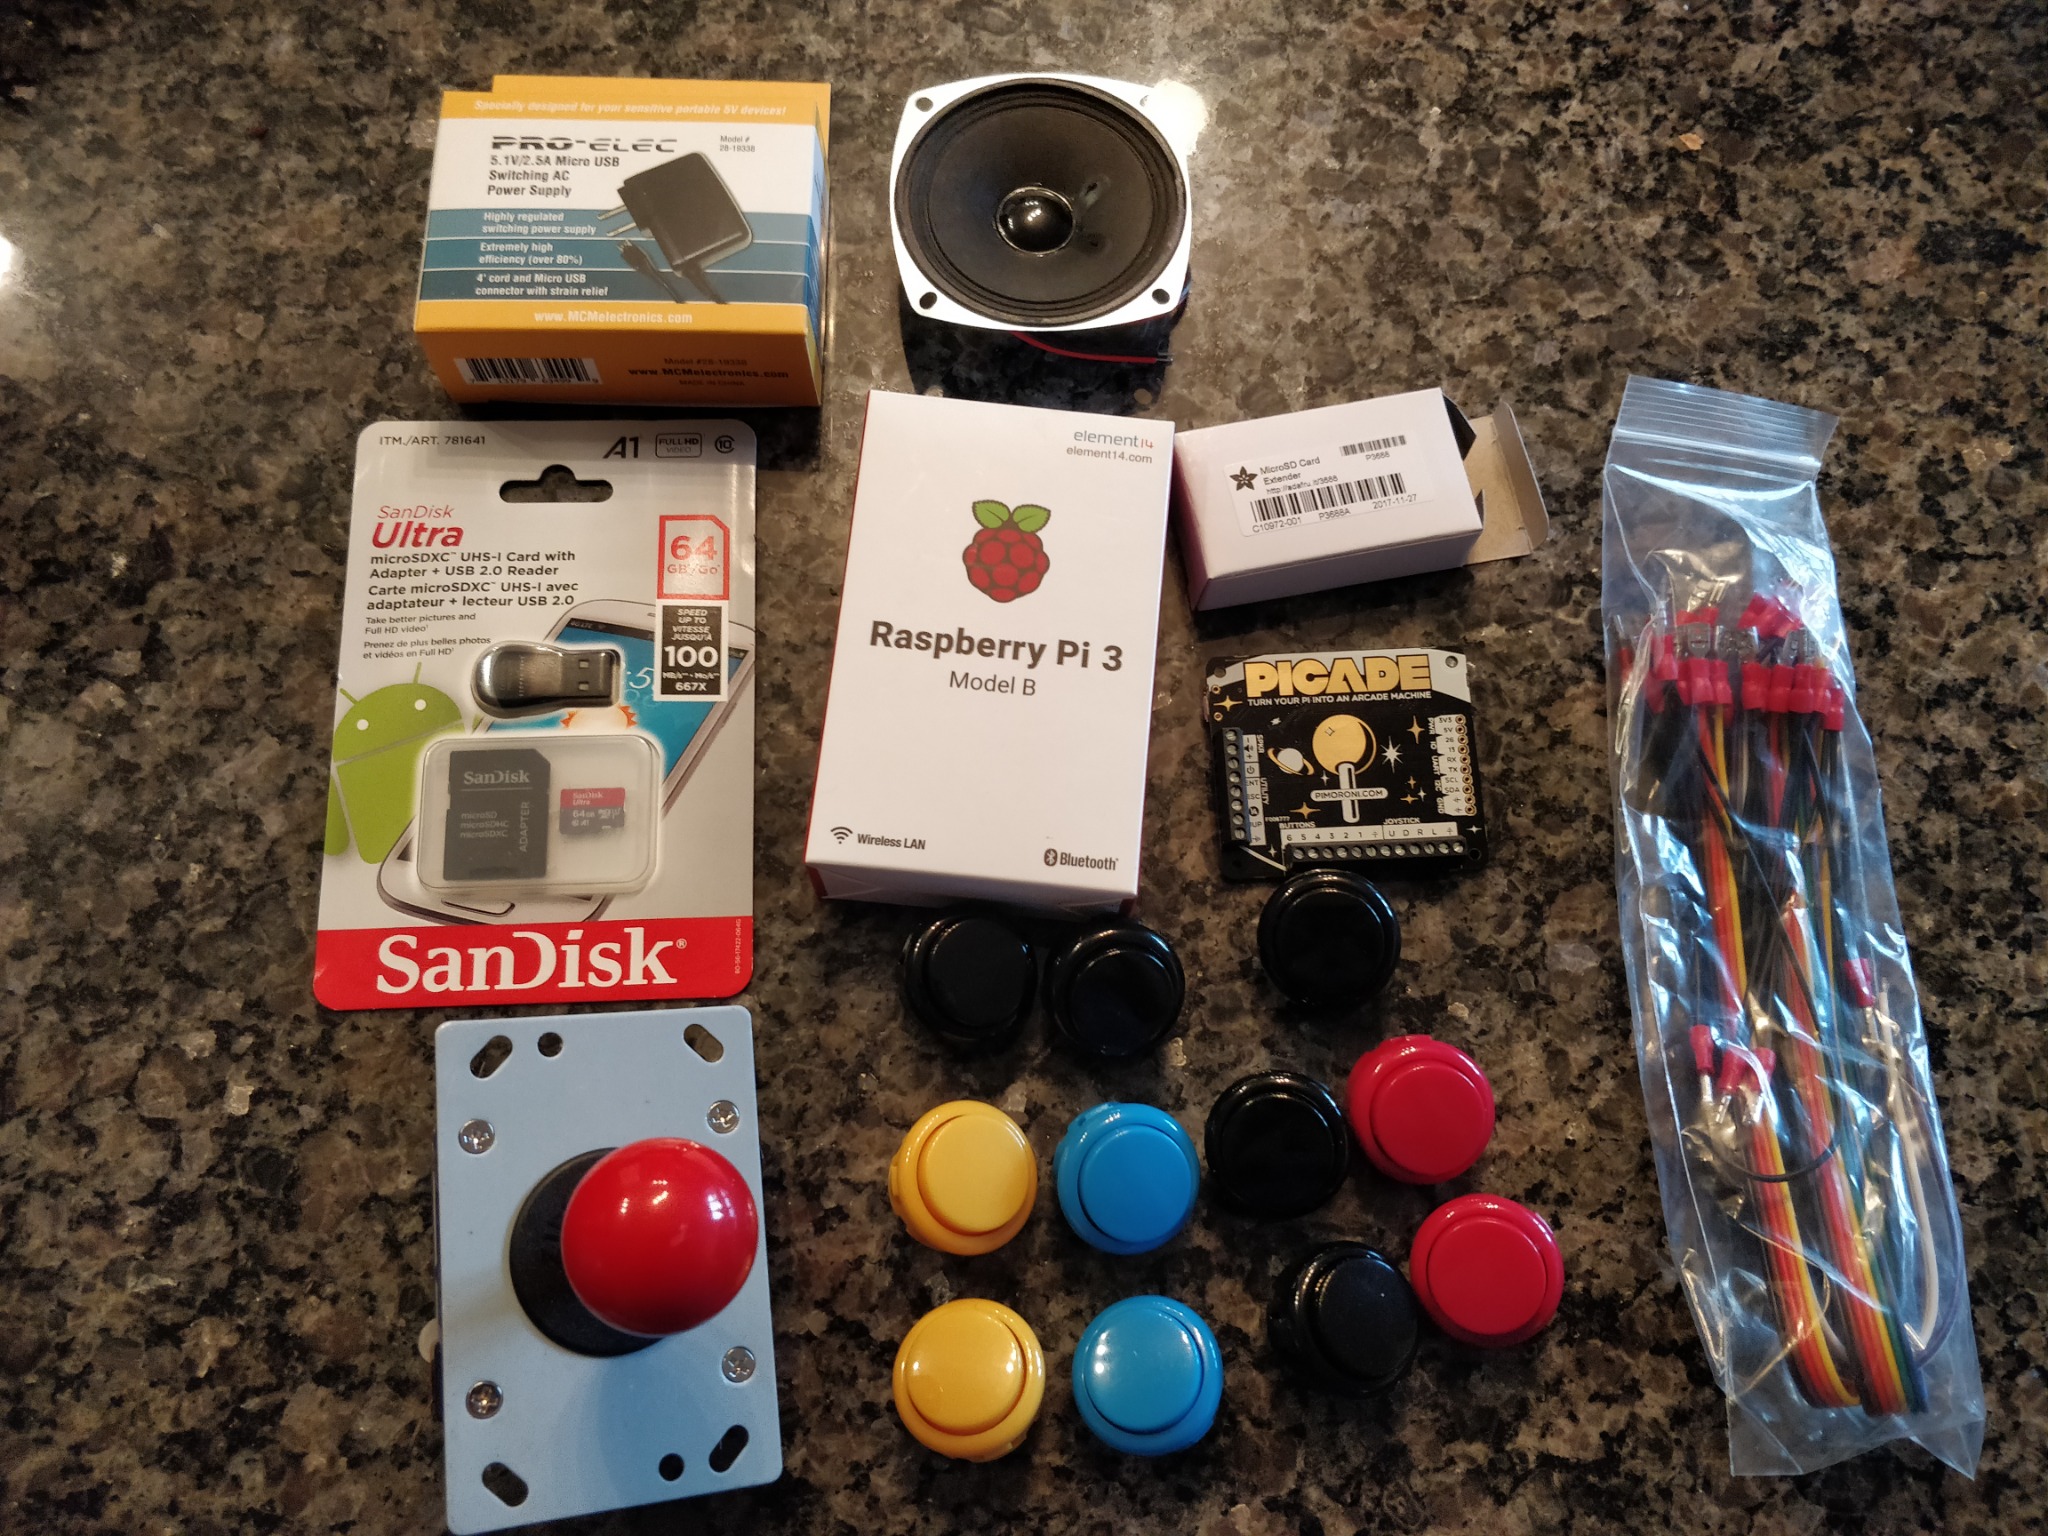
Kit:
Picade HAT and Parts Kit (Joystick, Buttons, PiHat, Speaker)
Rasberry Pi 3b
5v 3A USB powersupply
SanDisk Ultra 64GB MicroSD Card
MicroSD Card Extension
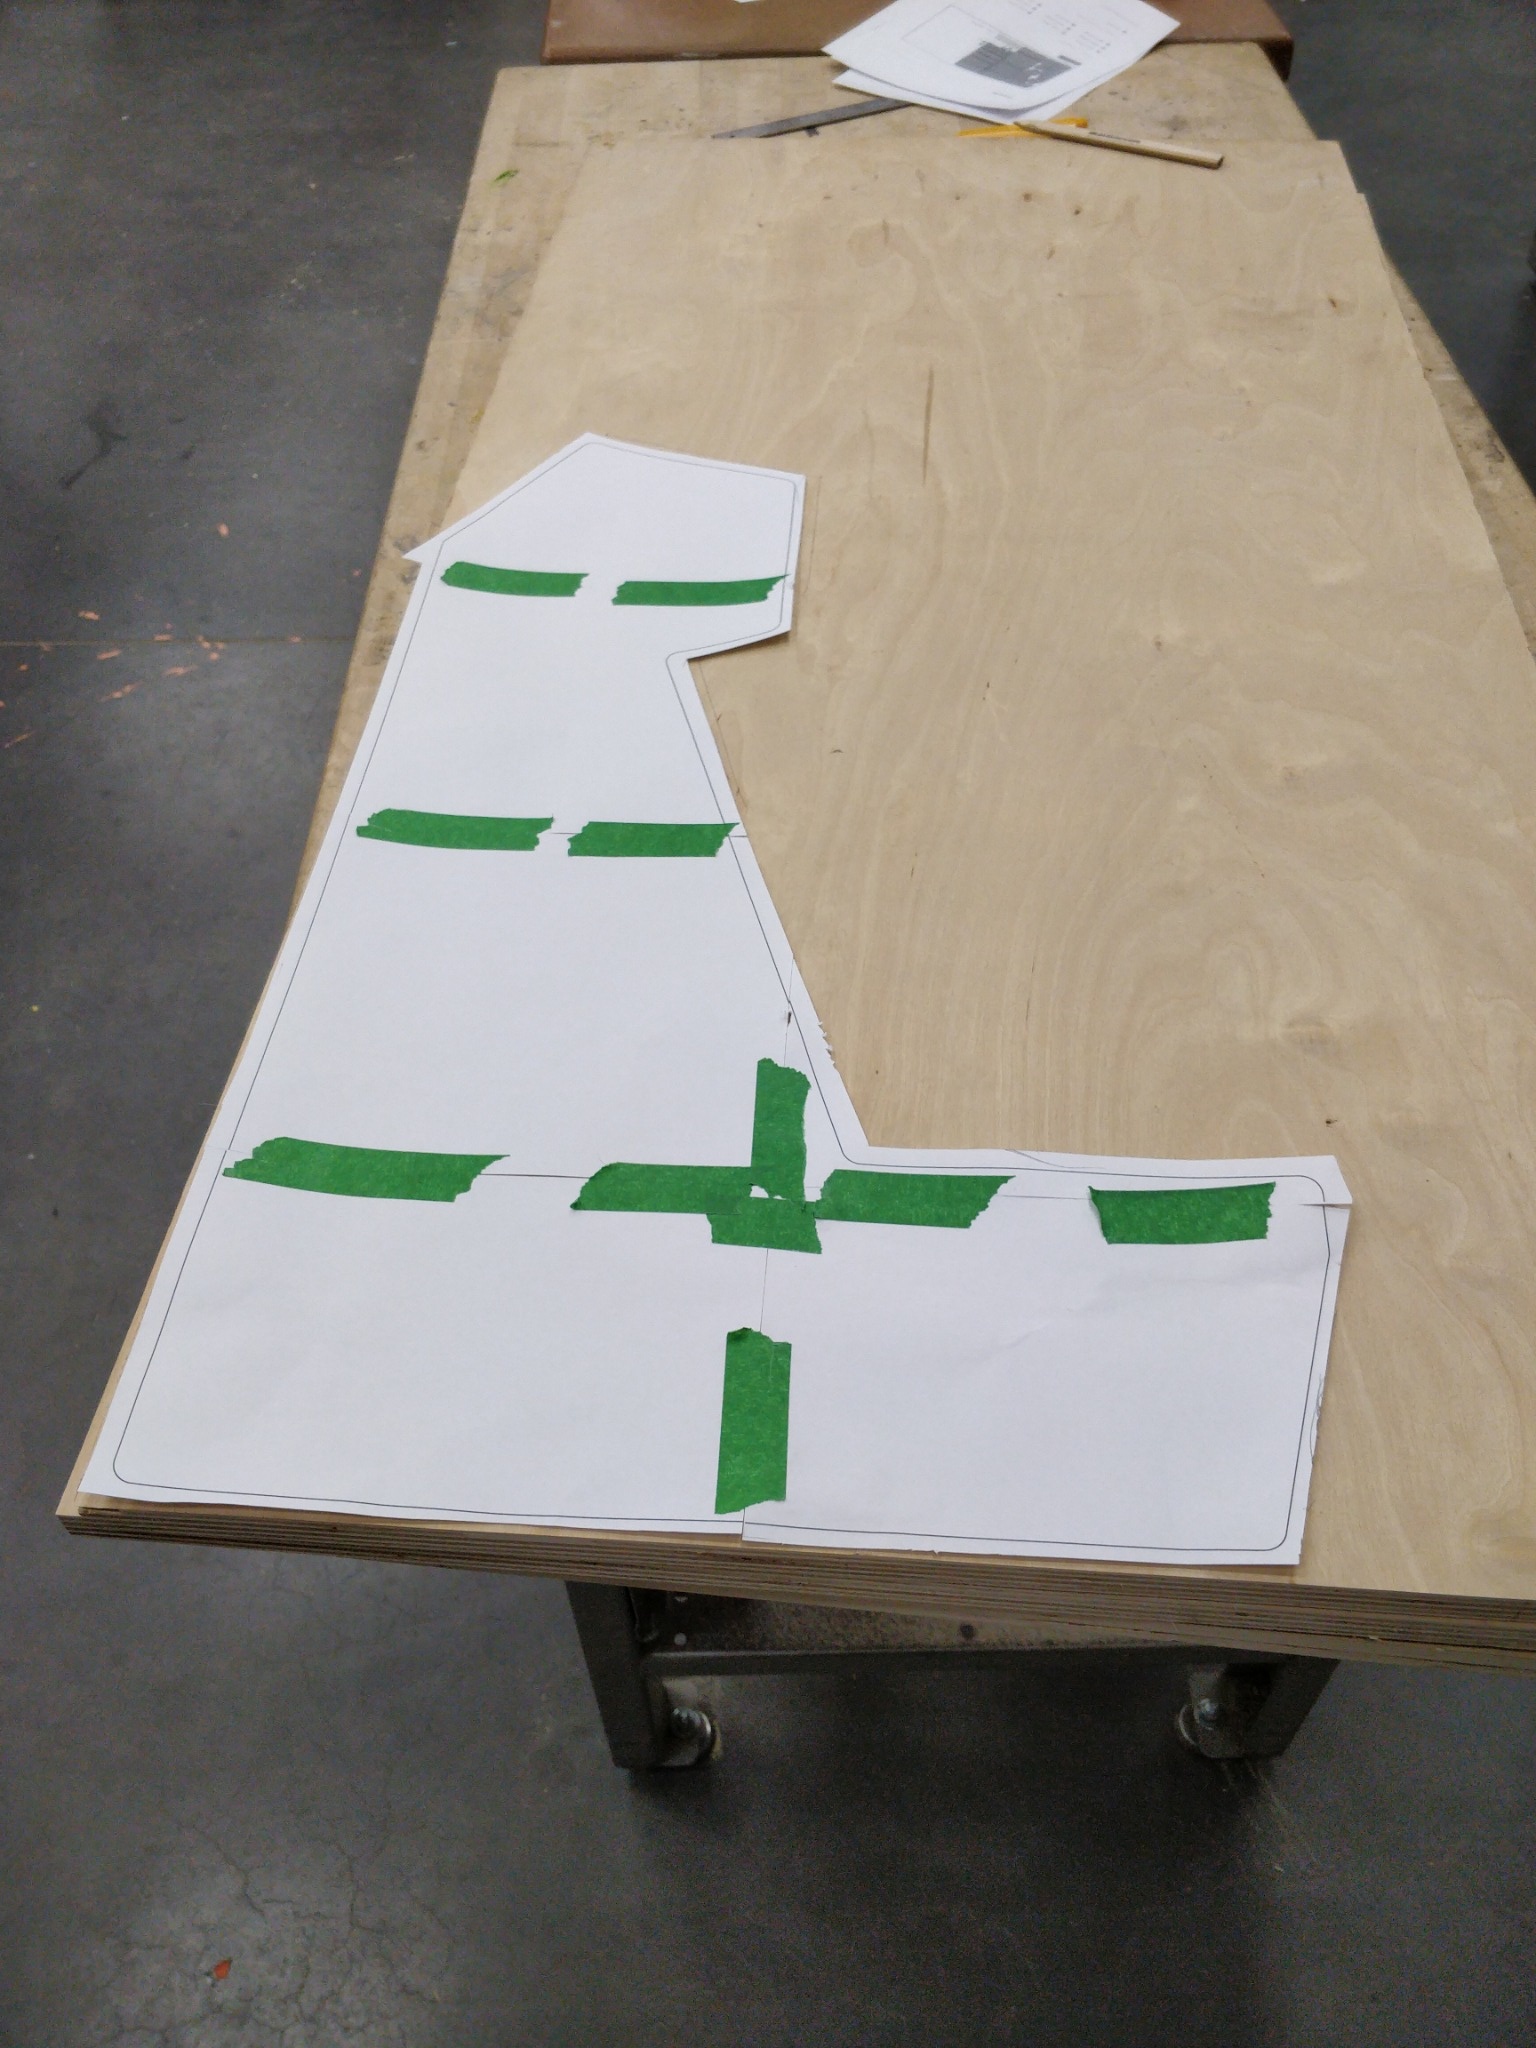
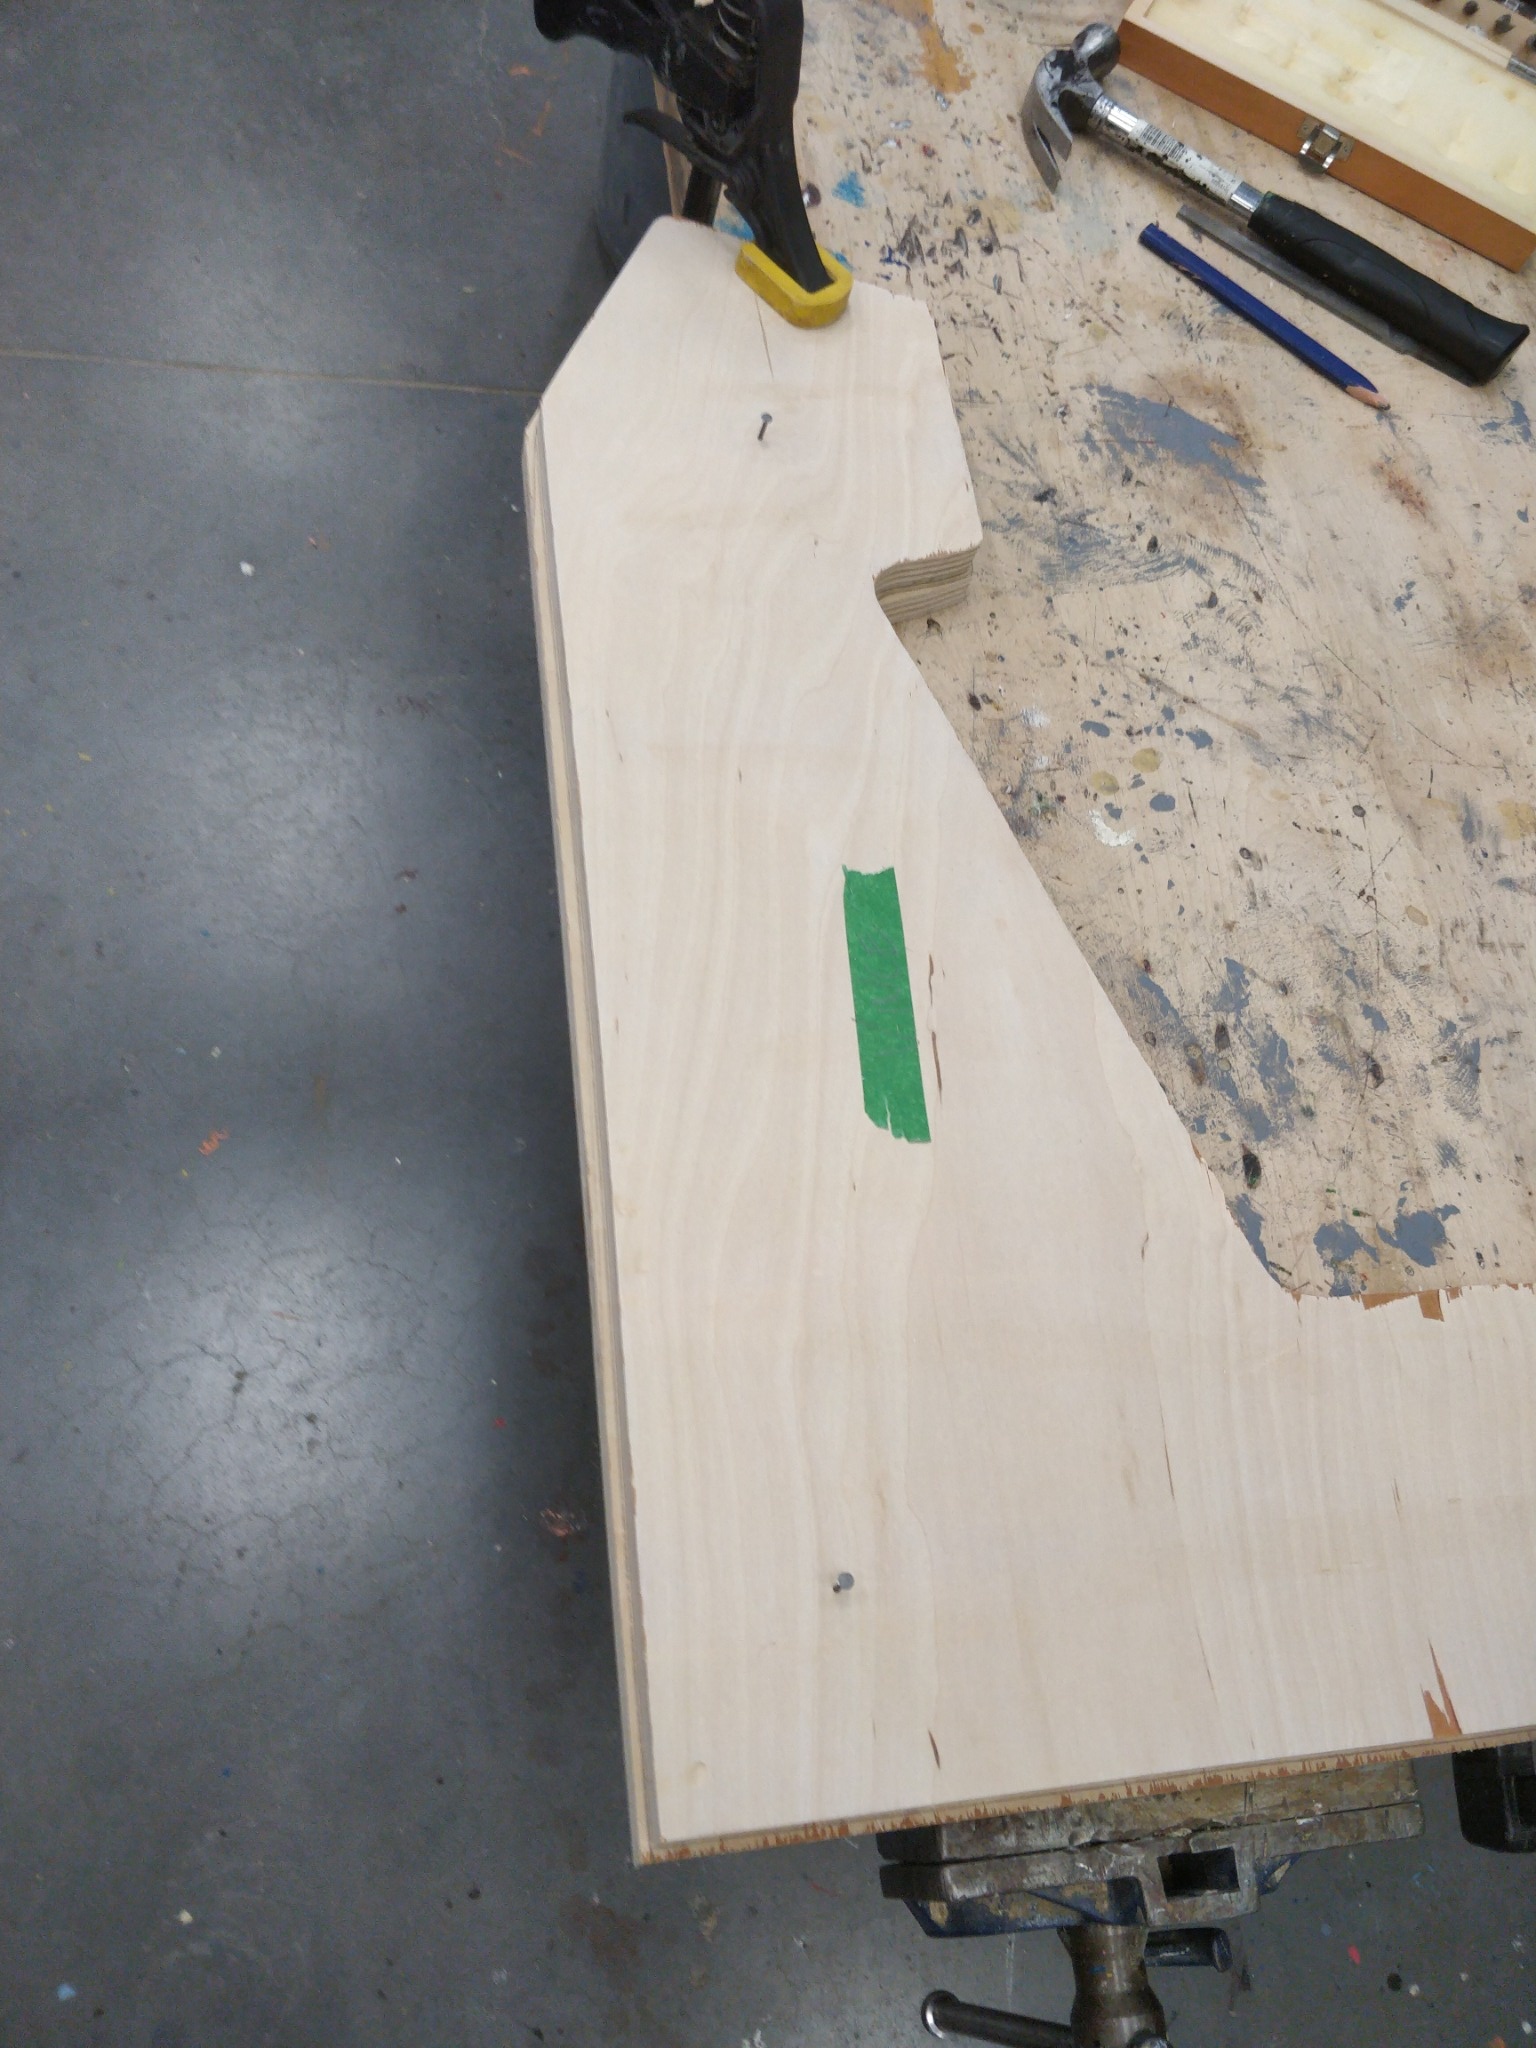
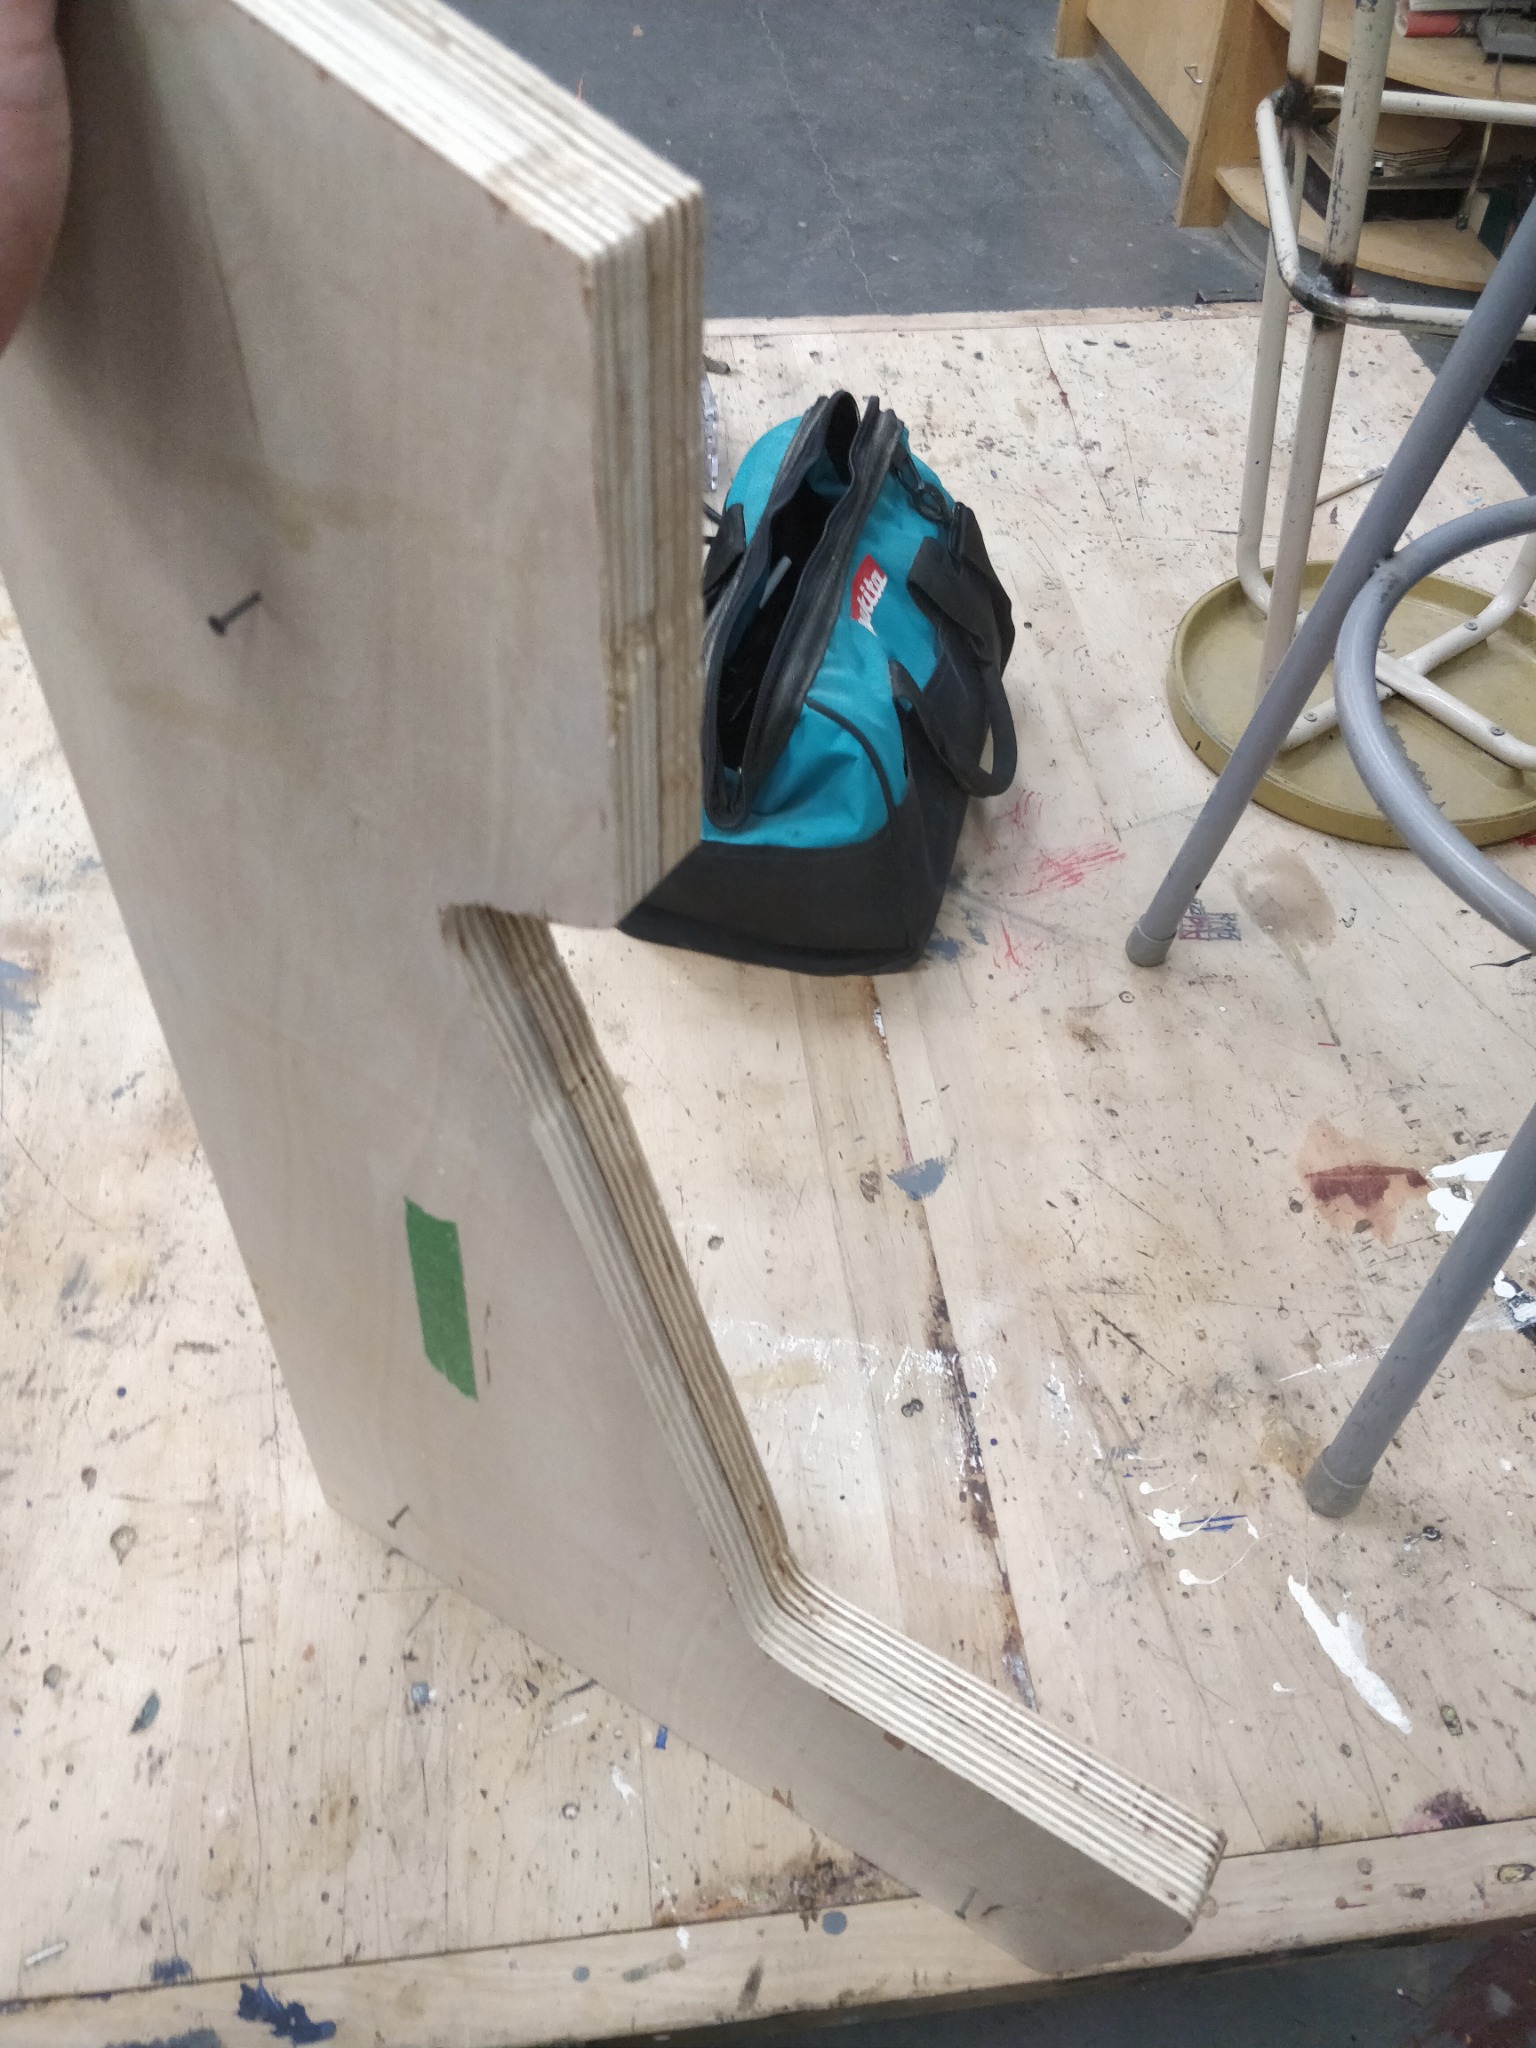
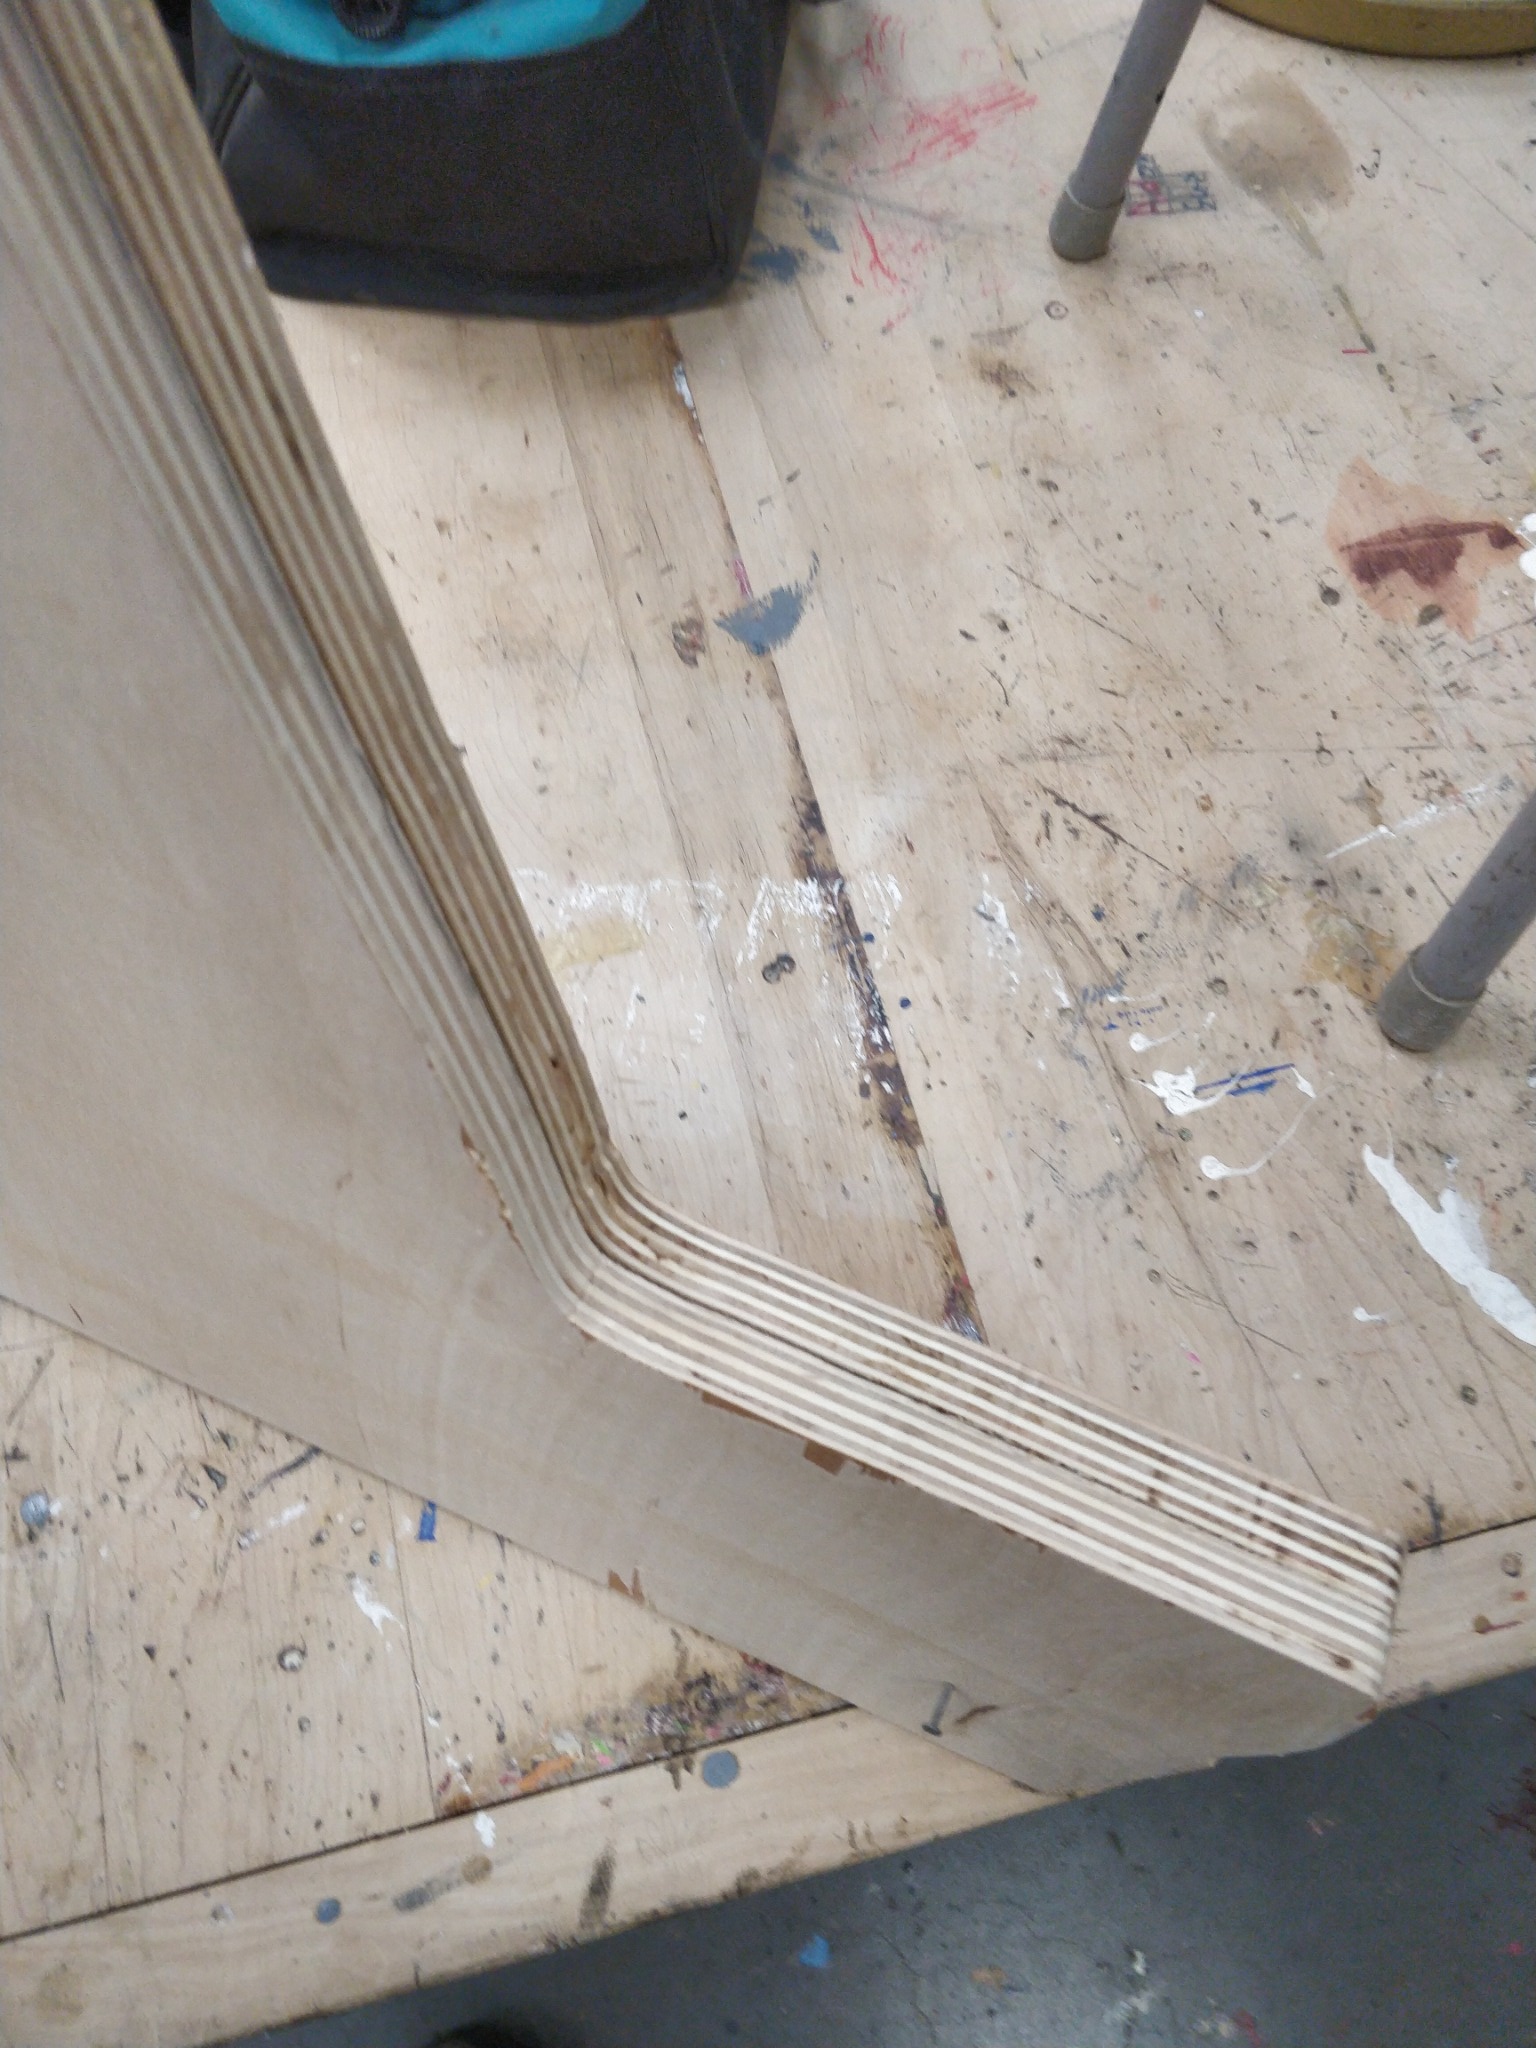
Currently I am using 1/2" Baltic Birch Plywood for construction, and I am slightly astounded how much it costs. Anyway you will need about 6' x 4' per unit. There are a lot of thoughts on the cabinet material, and I wanted 2 things: Smooth finish, and straight. I could have used project board, or MDF, but I kinda liked the look of the plywood when I was at the store:) Either way, at this point I have only bought enough wood for a single unit, as I want to evaluate the result a little before moving onto the second unit.
I think I may add a cooling fan to the custom, but not sure yet.
I still need to order T-Molding, and the T-Molding slot cutter. The school cabinet is going to have navy blue molding, probably a black panels, and if I can figure it out a white vinyl graphic. I have no idea about the custom unit colour scheme.
I have attached some project shots
Seriously though, I have been planning to build one for a while, ever since a previous retrofit project, and the school that is hosting the maker space wanted one for their internal maker space I thought I would give it a shot.
Both builds have their own unique components, but at the heart of them is a Raspberry Pi.
What are my goals:
- Both cabinets need to be bartop style (I don't have the space for a full one, and a kid cannopt be expected to move a full size cabinet.
- Use a Raspberry Pi for the brains
- Real arcade feel buttons, joystick, sound, t-molding
- One build is a custom version, and the other a kit
- The School version needs to be able to run Scratch games, not just emulation
- Document the process for everyone to learn from
- Learn - Make - Teach
Okay so where to start:
That's easy, I just said it "Learn", I need to learn what makes an arcade cabinet, and how others before me have done it before. The best resource has been Bob Clagett from I Like to Make Stuff . He has made a couple cabinets, and sells his plans from his website, and so we bought the full size and the bartop. He also has videos on actually building these units on YouTube
Additionally I probably spent months watching videos, reading blogs, and basically studying everything I could about building a cabinet. (I tend to greatly over think things)
Another really good resource that I found that is kinda local (Edmonton) is Retroactive Arcade . They have a tonne of tutorials and they also sell almost everything you could want, even complete cabinets, and custom units.
Okay, so I am building 2 units, what parts do I want in them? Again I spent way too much time on this but for my cutom unit, I wanted to make sure the sound was a little better so I opted for a DAC and 60W Amp, instead of just using the audio out of the Pi. I will include a true BOM for you to use if you ever want to try this on your own.
Custom:
Raspberry Pi 3b+
Sandisk Ultra 128GB MicroSD Card
MicroSD Card Extension
JustBOOM Amp Hat Kit
18v Power Supply
2 x 4" 30W speakers
Xin Mo Mame Controller Board
Zippy short metal arcade stick
12 x Fusion LED buttons
Kit:
Picade HAT and Parts Kit (Joystick, Buttons, PiHat, Speaker)
Rasberry Pi 3b
5v 3A USB powersupply
SanDisk Ultra 64GB MicroSD Card
MicroSD Card Extension
Currently I am using 1/2" Baltic Birch Plywood for construction, and I am slightly astounded how much it costs. Anyway you will need about 6' x 4' per unit. There are a lot of thoughts on the cabinet material, and I wanted 2 things: Smooth finish, and straight. I could have used project board, or MDF, but I kinda liked the look of the plywood when I was at the store:) Either way, at this point I have only bought enough wood for a single unit, as I want to evaluate the result a little before moving onto the second unit.
I think I may add a cooling fan to the custom, but not sure yet.
I still need to order T-Molding, and the T-Molding slot cutter. The school cabinet is going to have navy blue molding, probably a black panels, and if I can figure it out a white vinyl graphic. I have no idea about the custom unit colour scheme.
I have attached some project shots
-Vince-
What do you make?
Last edit: 4 years 11 months ago by VinceW. Reason: Missing pictures
Please Log in to join the conversation.
Time to create page: 0.160 seconds
- You are here:
-
Home

-
Forums
-
Projects
-
Maker Space Projects
- Arcade Cabinets